
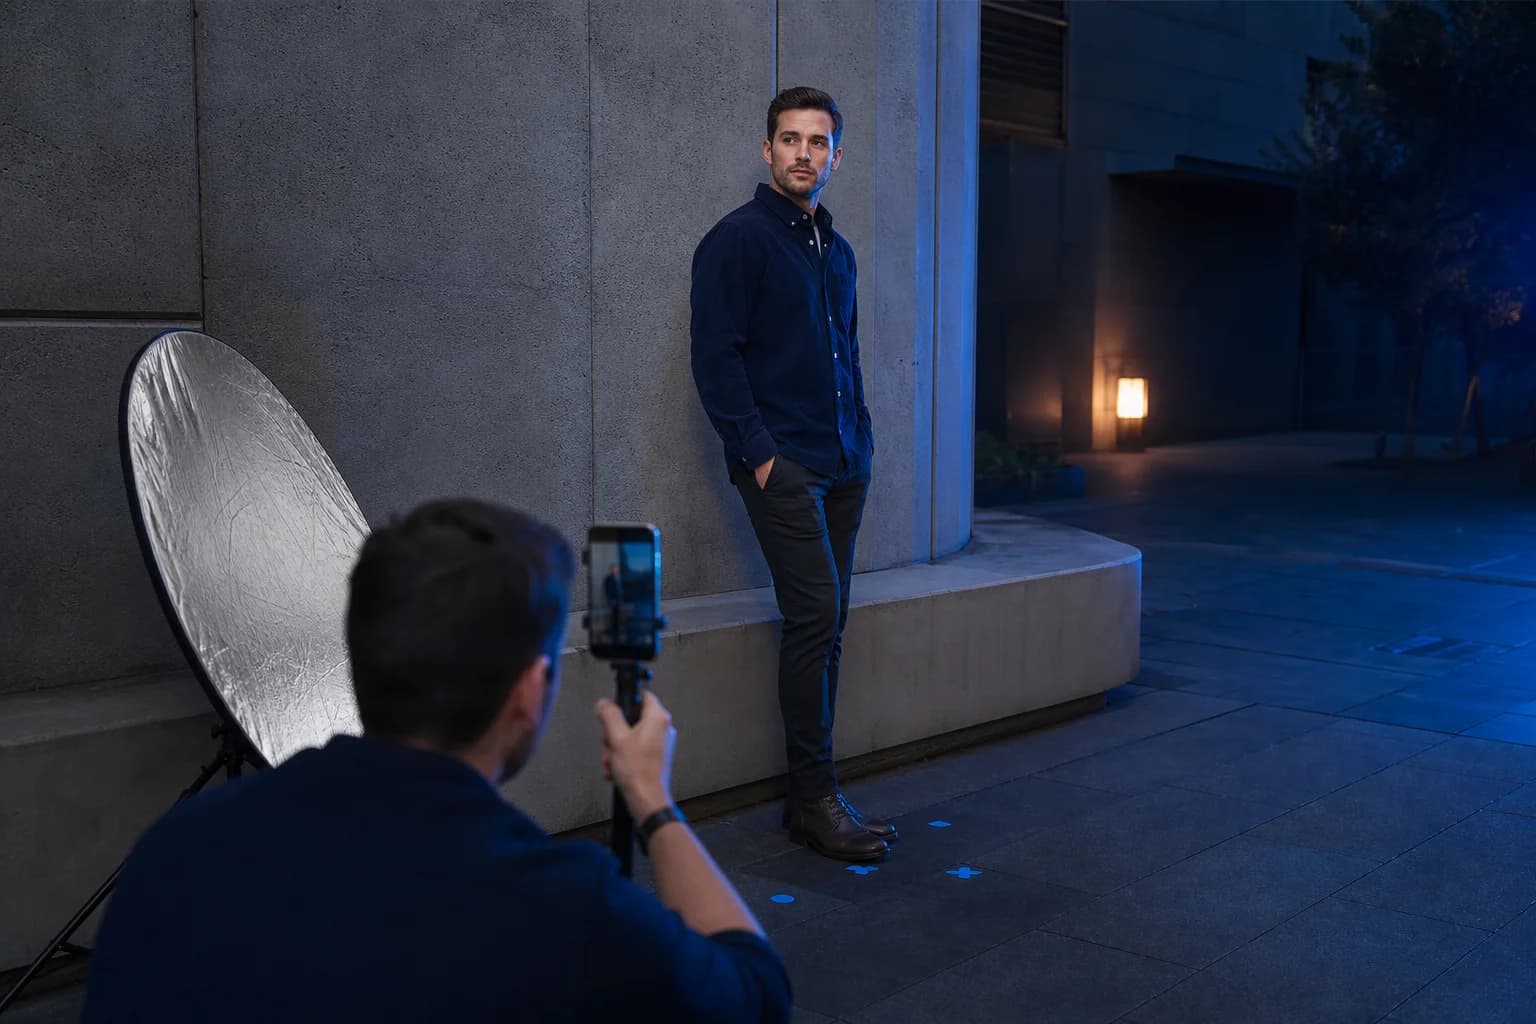
Looking better in photos is mainly a camera and presentation skill. A close wide-angle selfie can enlarge the center of the face, hard overhead light can deepen the eye area, and a rigid square pose can make the neck and shoulders look compressed. Change those variables and the same person can read much more clearly without a beauty filter.
The useful goal is not one lucky image. Build a setup you can reproduce for profile pictures, social photos and MogRise progress checks. Once distance, light and camera height are stable, small improvements in hair, beard, skin presentation, posture and clothing become easier to see and easier to repeat.
Start with camera distance before choosing your best angle
Distance has a bigger effect than most pose tricks. When a phone sits close to the face, the nose, lips and central features are physically nearer to the lens than the ears and jaw. The perspective difference becomes visible. Move the phone farther away, use the rear camera when practical and crop the finished frame instead of filling it from arm's length.
For a head-and-shoulders portrait, begin several comfortable steps from the camera. Keep the device level and avoid digital zoom during capture. If a friend is shooting, ask them to move rather than leaning the phone toward you. The result should resemble normal conversation distance, with the hair, ears, jaw and shoulder frame all readable.
Test camera height only after distance is fixed. Eye level is the cleanest baseline. A position near upper-chest height can give a full-body or environmental portrait more presence when the phone stays level. Extreme low angles emphasize nostrils and underside of the jaw, while steep high angles reduce the lower face. Use small adjustments, not a dramatic trick.
- Step back and crop instead of using a close selfie
- Keep the phone level before testing height
- Use the same lens for every comparison
- Include enough shoulder frame to support the face
Use soft directional light to define the face
Soft light gives the face shape without carving harsh shadows into every detail. Outdoors, use open shade near the edge of a building rather than standing in patchy sun. Indoors, face a large window and turn slightly until one side receives a little less light. The transition should be gradual across the cheeks, eye area and jaw.
Avoid relying on bright ceiling lights. They can leave the eye sockets dark, create a sharp shadow below the nose and separate the face from the neck. If the room has only overhead light, switch it off and move toward a window or broad lamp. A plain white wall or small reflector opposite the light can gently lift the darker side.
Keep the color of the light consistent. Mixed daylight and orange room light can make skin and clothing shift unpredictably. Choose one main source, check that both eyes remain visible and expose for the face instead of the brightest background. This produces a polished portrait while preserving natural skin texture.
Choose a men's photo pose that looks relaxed
Begin with your feet about hip-width apart and place slightly more weight on the back leg. Turn the torso ten to twenty degrees away from the camera, then bring the face back toward the lens. This creates depth through the shoulders without twisting the neck. Keep the chest open and let the shoulders settle down instead of pulling them back as hard as possible.
Give your hands a quiet task. Put one thumb in a pocket, adjust a cuff, hold a jacket edge or rest one hand lightly against a nearby surface. Do not press both arms flat against the torso, because that removes space and makes the pose feel frozen. Keep elbows slightly separated and fingers loose.
For a seated photo, sit near the front of the chair, place both feet securely and lean forward from the hips by a small amount. For a walking frame, move slowly through a marked path and look just past the camera before glancing toward it. Simple motion often releases the fixed passport-photo expression that appears when you hold one pose too long.
A strong men's photo pose creates clear lines and relaxed energy; it should not look like you are holding your breath.
Position your chin, jaw and expression naturally
Move the whole head a centimeter forward before lowering the chin slightly. The forward motion lengthens the neck-to-jaw transition; the small downward adjustment keeps the eyes connected with the camera. Do not force the jaw open, clench the teeth or stretch the neck. Those actions add tension around the mouth and can make the expression look rehearsed.
Relax the forehead first, then breathe out slowly through the nose. Let the lips meet gently or separate them by a tiny amount. If you want a smile, build it from a real reaction: speak to the photographer, think of a specific moment or look away and return to the lens. A sequence is more reliable than trying to manufacture one perfect expression on command.
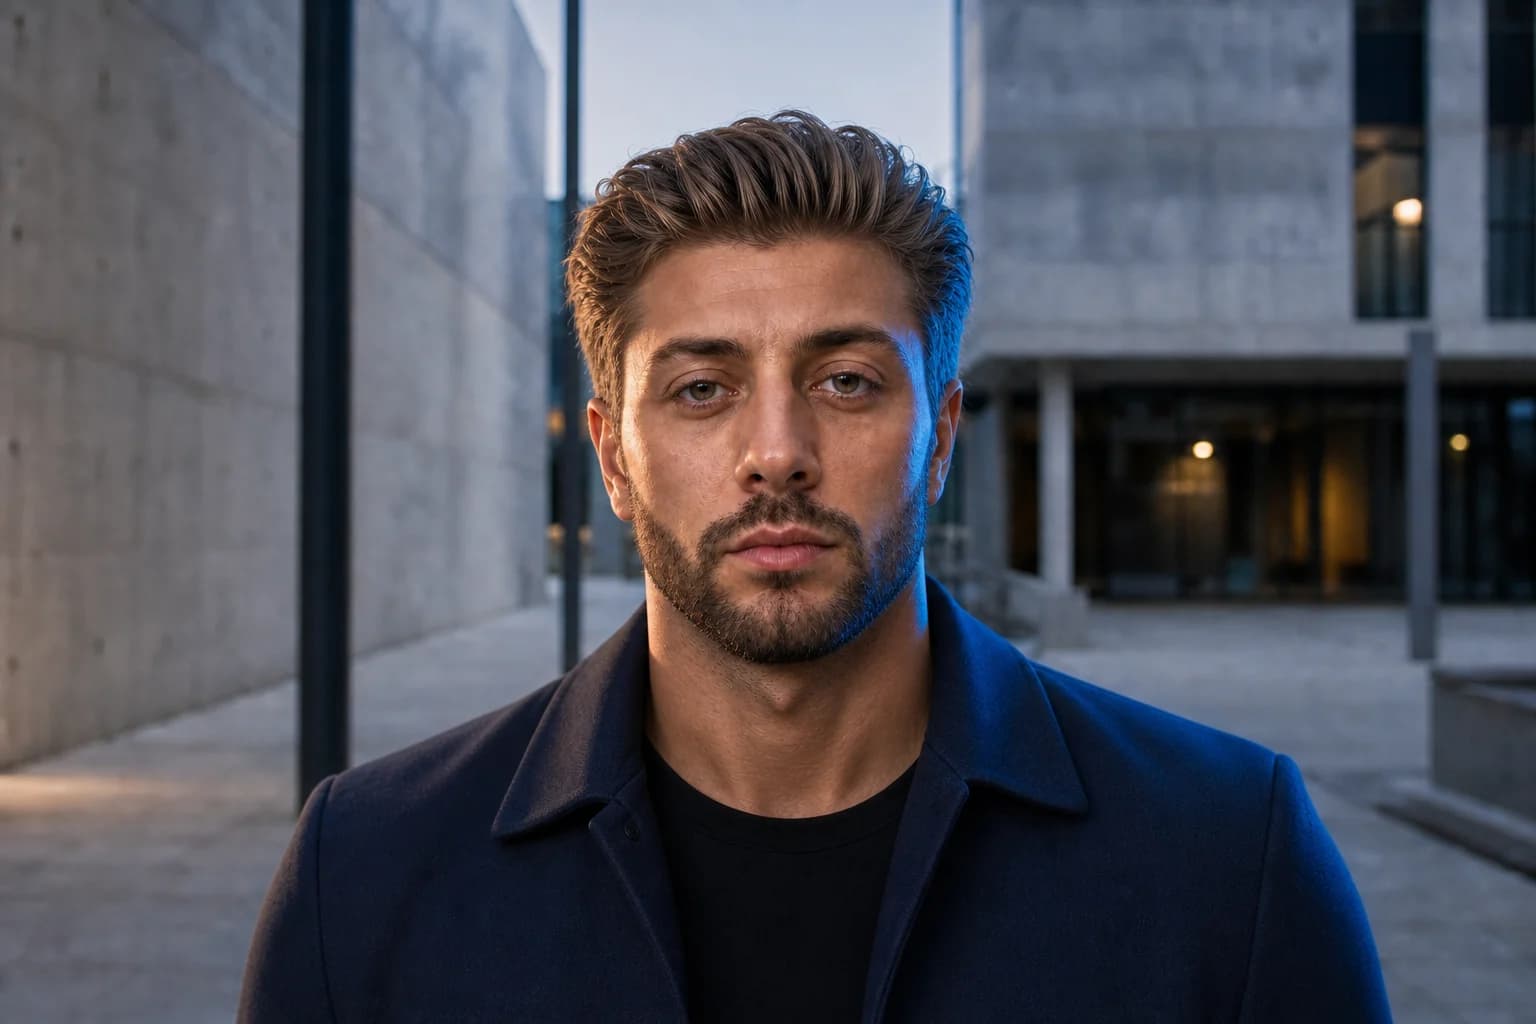
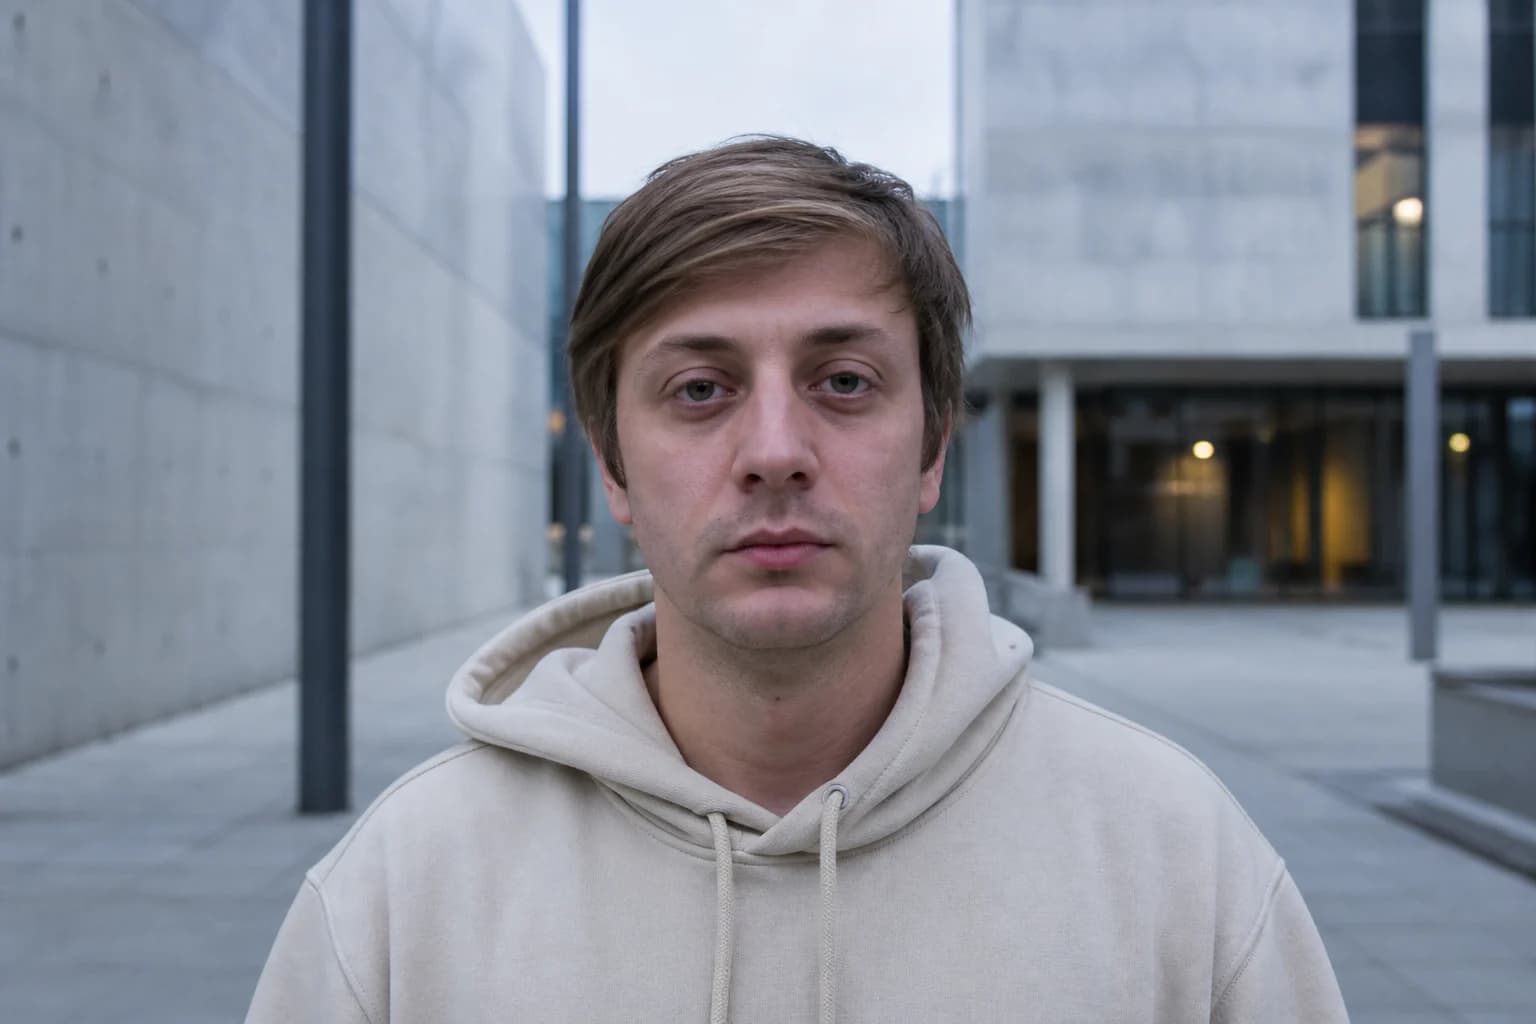
The comparison below shows why the complete frame matters. In the after image, high-volume hair, precise beard framing, a rested eye area, polished natural skin, upright posture, stronger shoulders, fitted dark clothing and jaw-defining light work together. The dramatic result does not come from one chin trick; it comes from coordinated presentation under aligned framing.
Match hair, beard and clothing to the photograph
Style hair for a clear silhouette before adding detail. Check the outline around the forehead, temples and crown from the camera position, because a mirror at close range shows different priorities. Use controlled volume and separate a few sections rather than coating the surface until it reflects every light. Carry a small comb for quick resets between frames.
A beard or stubble frame should have deliberate cheek and neckline boundaries. Brush longer facial hair in one direction and remove only obvious flyaways. If you are clean-shaven, finish early enough for temporary redness to settle. Eyebrows need the same restraint: brush them, control long tips and keep their natural density.
Choose a fitted solid-color top with enough contrast from the background. Dark navy, charcoal, deep olive and black often keep attention on the face while giving the shoulders a clear outline. Avoid tiny high-contrast patterns, large logos and a collar that collapses into the neck. Clean shoes and a coherent outer layer matter whenever the frame extends below the waist.
Build a five-minute photo sequence instead of one shot
Mark the camera and foot positions, then take a short series. Begin with the neutral baseline: eye-level camera, torso slightly turned, relaxed face and soft directional light. Next change only one variable at a time. Move the chin forward, shift the shoulder angle, give one hand a job, look away and return, then test a restrained smile.
Use burst mode or have the photographer take frames through each transition. The best expression often appears between held poses. Keep the camera position fixed while you test the body, and keep the body position fixed while you test camera height. This simple discipline tells you which change actually helped.
Stop after a few strong variations. A hundred random frames create selection fatigue, while twelve intentional frames create a clear comparison. Record the winning distance, height, light direction, torso angle and expression cue in a note. The next photo session begins from a known setup rather than from zero.
- Neutral front and three-quarter baseline
- One small chin and shoulder adjustment
- One simple hand position
- One look-away and return sequence
- One relaxed neutral expression and one natural smile
Select your best photo without rewarding distortion
First remove frames that are soft, mid-blink or visibly tense. Then compare the remaining images at the same size. Do not let one close crop win simply because the face appears larger. Check the eyes, mouth, hair outline, jaw-to-neck transition, shoulders and clothing as one composition. The best frame should remain convincing when viewed small.
Use a simple selection order: natural expression, clean light, balanced proportions, clear posture and useful background. Color and crop can be refined after those fundamentals. Avoid beauty filters that change facial structure or erase texture, because they prevent the image from serving as a truthful baseline for a FaceScore or LooksMax AI comparison.
Keep two versions when the purpose differs. A profile image can use more energy and environmental context; a progress photo should use neutral expression, fixed distance and repeatable light. Trying to make one image perform both jobs usually weakens the social portrait and the measurement baseline.
Save the setup in your MogRise Glow Up plan
Write down the camera model, lens, distance, height, floor mark, light direction and time of day. Save one uncropped baseline and one final crop. When you photograph a later haircut, beard change, skin-presentation routine or posture improvement, rebuild those conditions before judging the difference.
MogRise connects photo quality with facial analysis, FaceScore context and controllable priorities. If a new image suddenly changes the apparent jaw, forehead or eye area, check distance, camera height and light before changing the Glow Up plan. Stable inputs make the analysis easier to interpret and keep attention on real progress.
The app is being prepared as a free download for iPhone and iPad, with the App Store link coming when the listing is available. You can use the workflow now: step back, soften the light, create a natural pose, capture a short sequence, select consistently and save the setup. That is how to look better in photos while building a repeatable view of your true potential.